Showing posts with label check the technique. Show all posts

Tuesday, January 10, 2012

A Picnic and a Check the Technique

Link
Picture pilfered from the fabulous Helga Link

On Sunday Georgia and Ayesha organised a wee blogger picnic in Hagley Park. It was so nice to meet Christie, Laurel and Ayesha and see Georgia and Helga again. The weather was perfect and the rain that was forecast never arrived. It was great to chat about blogging, vintage and op-shopping while enjoying snacks and drinks.

I didn't take any photos because my camera is broken and I'm waiting for my new one to be sent but you can see more pictures at Georgia's and Helga's blogs.
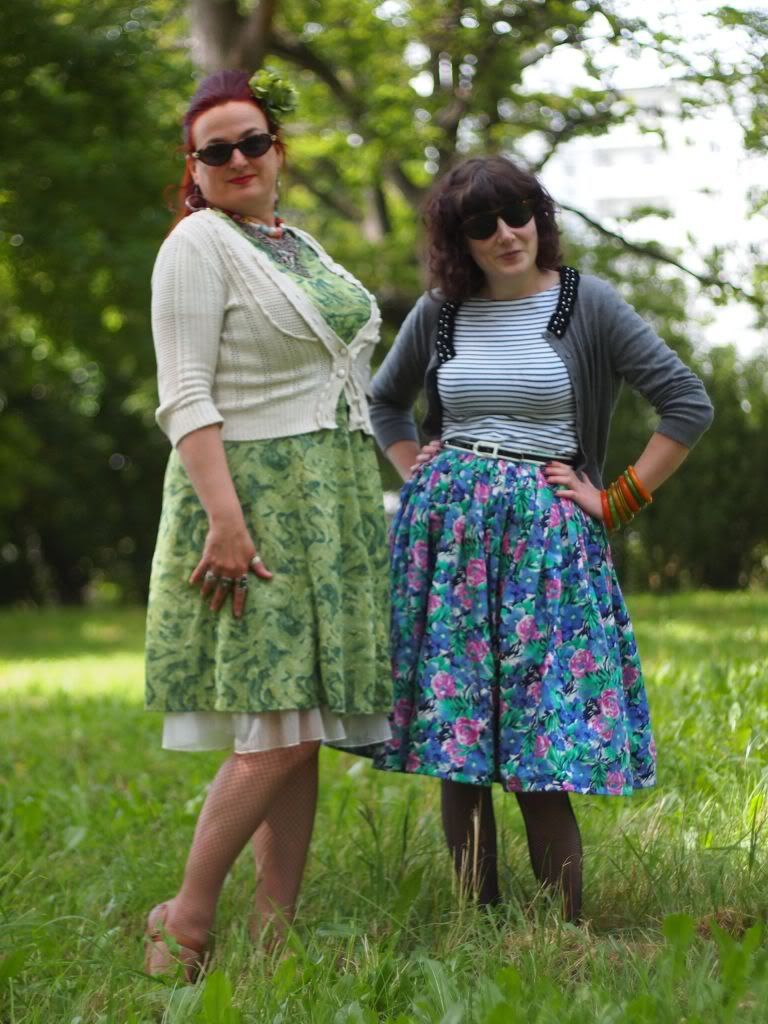
Picture pinched from the lovely Georgia

I wore a skirt sent to me by the very generous Brians an unusual name for a girl. She sent me a whole package of lovely stuff including a fabulous 60s lingerie set and some great dresses which I'll show you in another post. The skirt fabric is a gorgeous floral cotton. It was too long and needed a waistband and a zip so I cut some of the bottom off to make a waistband. I didn't have the right coloured zip in my stash so I made a placket and used some snaps and a hook and eye at the top.


I decided to use some horsehair braid in the hem which is on my Check the Technique list. Horsehair braid (not actually made of horsehair, it's kind of plastic-y), is used in hems to give them a nice shape. I followed the technique from Gertie's New Blog for Better Sewing. You sew it like a facing, then flip it up and topstitch it. As you can see from the above picture my machine didn't really like the horsehair braid. It looks okay on the outside but the inside's a bit wonky. When I use it again I think I'll sew the hem up by hand rather than topstitching it. The braid I used wasn't very wide (about 2.5cm) so the effect is quite subtle. It makes the skirt stand out sort of like I'm wearing a crinoline which I like.

Sunday, August 21, 2011

Check the Technique: Bound Buttonholes, Baby!

I was going to buy some organza to do my bound buttonholes on Monday but then this happened...again.


Cue three days being stuck in the house. It wasn't like that just in Christchurch either. It seemed like pretty much the whole country got snowed in. Even subtropical Auckland (way up north) got a tiny smattering. I finally got to the fabric store by the end of the week, so I spent yesterday practicing my bound buttonholes and then doing the real ones on the bodice of my dress.


Bound buttonholes have always seemed to me like some sort of scary monster that only expert sewers tackle. I think the most terrifying thing is that you have to cut into the fabric before you know if they're going to work. If you screw them up you've ruined your whole garment. I was determined when I started Simplicity 5098 that I would finally do some. The pattern suggested doing bound buttonholes and I thought they would look neater because the button detail is a focal point of the dress. Also, because they are rarely seen on ready to wear clothes these days, they always seem vintage-y to me.

I used this tutorial from Gertie's New Blog for Better Sewing. I've seen many different techniques for doing bound buttonholes but I definitely think this is the best. I think it gives you a lot more control and consistent results.

The tutorial says to use silk organza but, let's face it, I wouldn't even know where to buy that in Christchurch. The few fabric stores that would possibly sell it were destroyed in the quake and even a small piece would probably be way more than I am willing/able to spend. I just bought some cheap (about $5/m) polyester organza from Spotlight and it worked just fine.

These are a couple of my practice ones.

Not so Good

Better


The first one wasn't that great because I used pins instead of basting. If you're going to try it I would definitely recommend basting everything.

These are the real ones.


I'm not quite sure why my camera made the fabric look lighter around the buttonholes but it isn't like that in person. They're not perfect but I'm pretty pleased with them. You can see the purple organza I used in the corners slightly but it's only noticeable if you look closely. It doesn't actually matter if they're not perfectly uniform because once the buttons are done up you can't even see the buttonholes.


Verdict: Not as difficult as I thought they'd be and definitely worth the effort. I see myself making lots of clothes with bound buttonholes in the future.


Sunday, August 14, 2011

Check the Technique


Sometimes I feel like I have plateaued in terms of my sewing. While I have been trying to sew with different fabric (it is so hard for me not to make everything in florals or polka dots), I haven't really picked up any new techniques lately. Enter Check the Technique created by the super awesome Reana Louise. Basically, you create a list of techniques you haven't tried, try them and then write about your success/failure.

My list of techniques (some stolen from Reana Louise):

Scalloped Edge
Pintucks
Bound Buttonholes - posted here
Raglan Sleeves
Sew with leather
Sew with faux fur
Make a belt with a belt kit
Dye Fabric with tea or coffee
Draft a lining
Boning
Sew with laminate/oilcloth
Use horsehair braid in a hem- posted here
Quilting

I will probably add to this when I think of some more.


Incidentally, the next pattern on my list has three new techniques; bound buttonholes, raglan sleeves and drafting a lining. I'm sewing Simplicity 5098 in a textured purple wool with bright pink lining and green buttons. The purple is actually richer than it looks in the photo.


Sorry for not having more substantial posts lately. I have tests and essays and research projects all in the next week so I haven't been doing any sewing.