Showing posts with label DIY. Show all posts

Sunday, June 2, 2013

Fake Hatpin DIY

I have a couple of hats that need something to secure them so they'll stay on my head. I don't have any hatpins, and the vintage ones I've seen are really expensive. After seeing this tutorial, I decided to make one.  


You need a long doll needle to use as the pin. I had to buy a whole pack because you can't buy them individually. I also got some black faceted beads and some crimps.


I ended up hot gluing the bead over the eye of the needle because the crimps didn't feel that secure.


After making the first one, I made another shorter one with a bead from a broken necklace I had. 


I put an earring back on the end to stop any hatpin-related injuries. I really should get a silver one but, since I don't wear earrings, the gold was all I could find.

This was a quick project and so much cheaper than buying hatpin. I'll post a picture when I actually wear one of them with a hat. 

Wednesday, December 5, 2012

Schiaparelli Sunglasses: Take Two


So, I made another pair of Schiaparelli inspired sunglasses. I wanted them to look like one of the pairs in my original post that had pink and black roses. I couldn't find any black roses so I did pink and white. I like them, but I regret using the bright pink a little bit since I don't really wear pink, and most of my clothes don't go with them. 


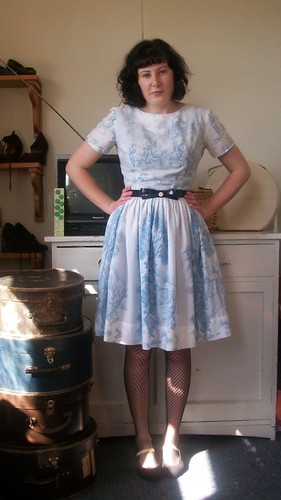
The dress is another thing I kind of regret. I made it a few years ago when I was just starting to sew vintage patterns. I love the fabric but don't like the drop waist. I don't know what I was thinking. I was probably seduced by the pretty 1950s pattern envelope and didn't think about the fact that drop waists remind me of the '80s. I'm making myself wear it because it seems like a waste of time and nice fabric if I don't. 

Dress: I made it
Shoes: Hunters and Collectors
Tights: Farmers
Belt: Off another dress
Sunglasses: Trademe (roses added by me)

Monday, October 15, 2012

Not like Dame Edna


When Miss Cavendish posted about these fabulous Elsa Schiaparelli glasses from the 50s, and then did her own DIY version, I knew I had to have a pair of outrageous floral sunglasses too.


I got some cats eye sunglasses. It was surprisingly hard to find ones that had thick enough frames to glue flowers on to. I could only put them on the corners.  
 

I bought these resin flowers off trademe.   


I used hot glue to attach them.


 People have already said, "Like Dame Edna, right?". No, not like Dame Edna.  

Tuesday, September 20, 2011

I actually made something and I bought a dress

I've been wanting to make a bow belt ever since I saw the tutorial over at Casey's Elegant Musings. I loved the original patent leather belt that the design was based off. I looked for some vinyl at the fabric store but they only had thick furniture weight in matte colours. I also kept a lookout when opshopping for a leather skirt or something which I could cut up and use. I didn't have much luck until the other day when I found the skinny patent belt in the picture below. I had bought the large patent belt ages ago but I didn't wear it much because it was too bulky. The colours were a perfect match so I figured I could use the small belt as the base and cut up the big one to make the bow.


I cut a strip along one side so it had one of the rows of stitching from the original belt on it. I planned to do another row of stitching along the other side but after sewing some practice bits with a leather needle and a teflon foot I wasn't sure that my machine (an 80s Brother) would cope with it. My Elna is in getting a service at the moment otherwise I would have used that. I have read that people use Supermatics to sew leather shoes together. I am impatient and I didn't want to wait the 10 or so days it will be before I get my machine back so I just decided not to do the other row of topstitching. Once I folded it up into the bow it wasn't actually that noticeable that only the top edge was stitched.


Peg to hold it while the glue was drying


I used some random glue we had at home that said it could be used on leather. Since I didn't actually have do any sewing, it was simply a matter of gluing all the pieces together and letting them dry. I glued a button in the middle because I tried a tab but the thickness of the material made the bow look all squashed and funny.


The flash on my camera makes it look like there are marks on the bow but it's just the light.

Handmade Bow Belt


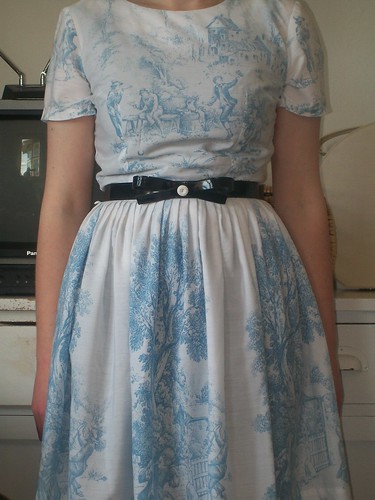
I expressed my love of toile a couple of posts ago so when I saw this dress at Small Earth Vintage I just had to buy it. The exchange rate is actually quite good at the moment (for once) so browsing Etsy is dangerous.
100_2661
I really need to stop slouching


I forgot to take a close-up of the toile fabric but you can see it and the belt slighter better in this picture.

I'm really pleased with the way the belt turned out. I want to make a ton more in all different colours. Maybe red next time?

I'm still working on my purple wool dress at a snail's pace. I can't seem to work up the energy to sew it quickly because, with the warmer weather, I'm probably not going to be able to wear it until next Autumn anyway.

Sunday, August 28, 2011

Follow the yellow brick road


I was going to try and finish my dress yesterday but then the weather turned out glorious. I didn't much feel like sewing a wool dress while the sun was shining so, instead, I did something that had been on my to do list for a while. Glittery shoes! I have wanted to try covering a pair of shoes in glitter ever since I saw the tutorial on Rhia' s blog, Evil Dressmaker. I sat on the deck in the sun (gotta get that vitamin D) with some paint, glitter and glue. It was like being back at primary school. Playing with glitter was just as fun as I remember.


I was going to give these brogues to the op shop because I don't really wear brown shoes but I thought they would be perfect for covering with glitter. I had to paint them red first so the brown didn't show through.


I did four layers of the glue and glitter letting each layer dry before doing the next. They dried really quickly because it was so sunny.


I added some ribbon as laces.


The picture below is closer to the true colour. I love the way they turned out. I want a pair in every colour.


Friday, November 20, 2009

Zipper Rosette

After seeing jewellery made out of zippers all over the internet I decided to try making a brooch out of some 50 cent zips I got from the fabric store. It was surprisingly easy. I just cut the zipper pull off and separated the two sides. Then I folded the end over, wrapped it around and sewed it with a needle and thread as I went. I then put a safety pin and the back so I could put it on cardigans.